Start Here: What Most Buyers Miss
In humid-climate RV lots from Florida to the Carolinas, roughly 6 in 10 used rigs that look clean on the surface will show moisture readings above 20% when you put a meter on the walls. I once walked away from a spotless-looking Class A motorhome in Sarasota because there was a faint, barely-perceptible give in the carpet near the driver-side slideout. A $25 moisture meter read 38%. The floor joists were rotted through. The seller genuinely had no idea — he'd bought it that way himself.
That's the nature of used RV shopping: almost every serious problem leaves evidence an informed buyer can find. Water damage stains walls. Delamination bubbles fiberglass. Worn seals crack visibly. Sellers often don't know what they're selling — your job is to find what they missed, and the method for doing it consistently is more straightforward than it seems once you have the right tools and know where to look.
When to Buy — Timing Changes What You Find
Spring (March through May) is peak used RV inventory season as snowbirds trade in winter rigs and dealers restock. It's also when freeze damage from the previous winter shows up — a roof leak that went unaddressed all winter may get a fresh coat of interior paint and some air freshener before hitting the April listings.
Fall inspections have a practical advantage most buyers overlook: schedule your walkthrough after rain, or in morning dew, and you'll see exactly where water pools on the roof, runs down the exterior walls, and sneaks into slide gaps. If you have flexibility on timing, wet weather is your friend. Desert Southwest rigs — anything that's spent years parked in Phoenix, Tucson, or Las Vegas — often come with attractive prices but UV-hammered EPDM roofing. Lap sealant on a sun-baked Arizona rig dries and cracks in 3–4 years instead of the typical 5–7, so budget for a full roof reseal even if everything else checks out.
The Depreciation Math — and Where It Falls Apart
New RVs typically shed a significant portion of their value in the first year — dealers and NADA guides often cite figures in the 20–30% range, though the actual drop varies considerably by class, brand, and condition. Buying a 2–5 year old rig can let someone else absorb that initial hit while you get a fully-equipped coach at a real discount. But the math only works if the rig is genuinely sound. A $35,000 "deal" on a water-damaged fifth wheel can run $8,000–$15,000 in repairs before it's livable — and those repair costs are invisible until you look for them.
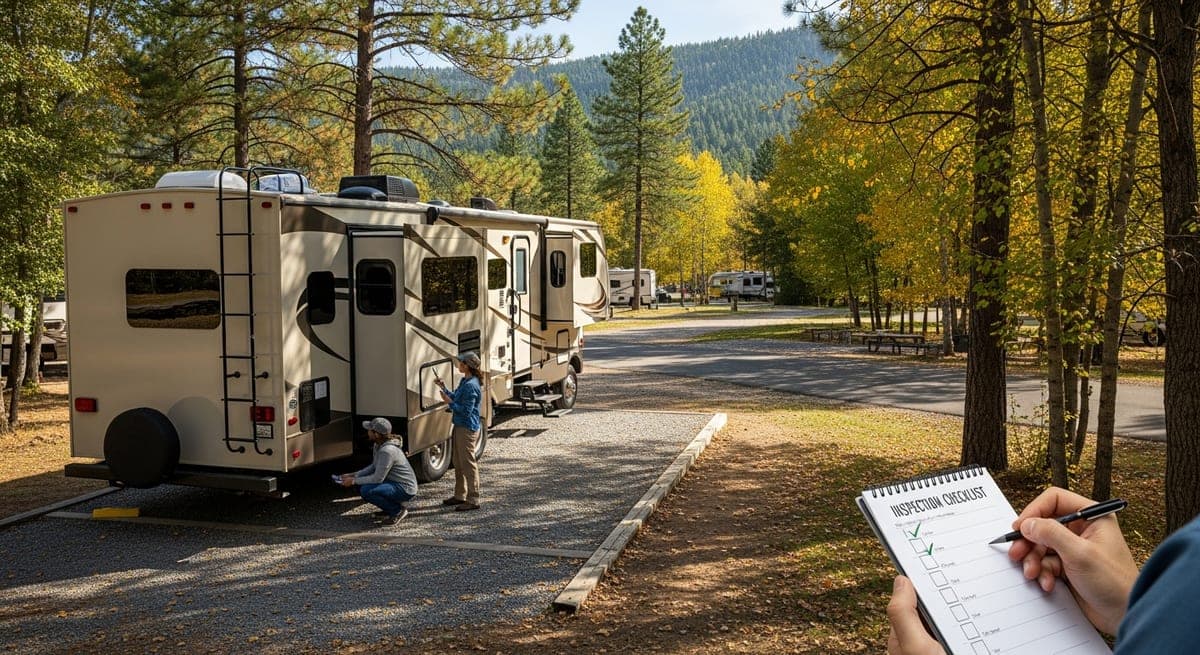
Your Inspection Toolkit — Don't Show Up Empty-Handed
Four tools will catch 90% of serious problems before you spend a dollar:
- Moisture meter: General Tools MMD4E (~$25) or the Ryobi RY-MM115. Press the pins into every wall section, floor, and ceiling corner. Readings above 20% warrant a closer look; above 30% is active or recent water damage.
- Flashlight: Anything 1,000+ lumens with a focused beam — Fenix PD36R is excellent, but a $15 hardware store LED works fine. You need it for ceiling corners, under cabinets, and reading the roof surface at low angles.
- Outlet tester: Klein Tools RT105 ($12) or any 3-light GFCI tester. Plug into every 120V outlet. Takes 10 seconds and catches miswiring that no visual inspection will find.
- Your fist: Press firmly on every wall, floor section, and the roof surface. Soft or spongy areas don't need a meter — they're already telling you something.
Exterior Inspection: Start with the Roof
The roof is the single most important inspection item. A compromised roof allows water intrusion that quietly destroys walls, floors, and structure over months. You must physically get on the roof and inspect it. If the seller won't allow this, that alone is your answer — walk away.
Walk the entire surface and press with your fist every few feet. Soft spots mean rotted decking below, and on a Gulf Coast or Pacific Northwest rig that's spent time parked outside, assume the roof has been stressed more than it looks. On EPDM rubber roofing, check for tears and cracking around AC unit bases. Lap sealant — the white caulk around every roof penetration — should be pliable. Old sealant is brittle and will crack when you flex it with a fingernail. Missing or badly cracked sealant without documented maintenance history is a red flag regardless of how clean the interior looks.
Standing water depressions are a yellow flag: they mean repeated pooling, which accelerates UV breakdown and can mask slow leaks that have been running for seasons.
Exterior walls: Press firmly on every section, especially around window frames and slideout openings. Salt-air coastal rigs — anything that's lived near the Atlantic or Gulf — often show early rust at exterior screw penetrations and aluminum frame joints even when the interior looks clean. Check low wall sections where water runs after rain.
Fiberglass delamination: Stand at the corner of the RV and look down the length of the wall in raking light — early morning or late afternoon is ideal. Bubbling, waviness, or blistering means the fiberglass skin has separated from the foam core. Minor delamination is cosmetic. Anything covering more than a few square feet is structural, typically costs $2,000–$5,000 per panel to repair, and usually means the rig has been wet inside for a long time.
Slide-outs: Operate every slide and inspect weather-seal contact all the way around — top, sides, and especially the floor seal at the bottom. These seals are where water gets in quietly for years before anyone notices the floor going soft.
Interior Inspection: Follow the Water
Water damage leaves a trail. Work the moisture meter systematically — every wall section along the floor, ceiling corners at every window, slideout room walls and ceilings, and the floor around the toilet, shower, and kitchen sink.
- Ceiling corners near windows — brown staining or ring marks indicate past or active leaks from above
- Floor at slideout room perimeter — soft floor means water entered at the slide seal and sat in the subfloor
- Under every sink — look for staining, soft floor panels, or moisture the meter catches before your eyes do
- Smell: musty or earthy odor is mold. If the rig smells aggressively of air freshener or plug-ins, walk outside, take a breath of fresh air, then step back inside and notice what hits you first. Masking a smell requires a reason.
- Slideout room ceilings and inner walls — water often enters at the top seal and runs down inside the wall cavity for months before showing up as staining
Test every appliance under load: Run the refrigerator in both gas and electric modes for 15+ minutes each, the furnace, AC, water heater, microwave, and every stove burner. A furnace that lights immediately but shuts off within a few minutes has a flame sensor issue that won't show on a quick power-on test.
Run the water system: Fill the fresh tank, pressurize the system, and run every faucet, the shower, and the toilet. Watch under every sink while the water is flowing. If the seller won't let you pressurize the system, treat it as a deal-breaker — the reason is almost always a leak they don't want you to find.
Mechanical Inspection (Motorhomes)
For motorhomes, standard used-vehicle inspection applies on top of the RV checklist:
- Engine oil should be amber to light brown, not black or milky — milky means coolant contamination and a possible head gasket issue
- Check the coolant overflow reservoir; any chocolate-milk coloring is serious
- Let the coach sit for 20 minutes, then check the ground for fluid spots before the test drive
- Tires: find the DOT date code on the sidewall — four digits at the end, e.g., "2419" = week 24 of 2019. Any tire over 6 years old is high risk regardless of tread depth; budget $1,500–$4,000 for a full set if they're aging out
- Transmission should shift smoothly through all gears; a hesitation or shudder between 2nd and 3rd on a test drive often signals a worn valve body
Model-year and brand notes worth knowing: Keystone Cougar fifth wheels from 2018–2020 had inconsistent lap sealant application at the front cap seam from the factory — probe that seam carefully even on an otherwise dry rig. Thor motorhomes from 2016–2019 equipped with residential refrigerators frequently show condensation damage on the wall behind the fridge from door seals that pulled away early. On Ford E-450 chassis Class C coaches, check the front suspension leaf spring mount welds on anything with over 80,000 miles — fatigue cracking in that range is documented in owner forums and worth a close look. None of these are automatic deal-breakers, but they're exactly where to point your meter and your fist.
A pre-purchase inspection by an independent RV technician or mobile inspector runs $150–$400 and is worth every dollar on anything priced above $20,000. They bring thermal cameras and lift equipment and have a practiced eye for problems a first-time buyer will walk past three times.
Red Flags That Should Make You Walk Away
- Seller won't allow roof access
- Seller won't let you run water or test appliances
- Fresh paint or new flooring in specific sections only — not the whole rig
- Strong air freshener, plug-ins, or candles throughout
- Soft floor anywhere — especially near slides, toilet, or shower
- Extensive fiberglass delamination on exterior walls
- Missing or cracked lap sealant with no maintenance records
- Title in a different name than the seller's with no documented explanation
- Moisture meter reads above 30% on any wall or floor section, even if it looks dry to the eye
Related: Choosing the right RV class · RV insurance shopping guide · First RV trip checklist
Ready to Plan Your Trip?
Put this knowledge to work. Let our AI build a personalized RV itinerary for your next adventure — or browse community trips for inspiration.