This article contains affiliate links. If you make a purchase through these links, we may earn a small commission at no extra cost to you. Learn more.
The black water tank gets all the attention from first-timers, but veteran RVers on forums like iRV2 and Escapees consistently report that gray tank overfills are the more common first-season surprise — sink and shower use outpaces toilet volume by roughly two-to-one in typical camping patterns. Understanding how all three systems interact before your first trip out prevents the campsite scrambles that generate the most cautionary posts in online RV communities.
Three Separate Systems, One Plumbing Network
Every RV with a bathroom and kitchen manages three distinct water streams:
- Fresh water: Clean water flowing to your faucets, shower, and toilet. Stored in the fresh water tank (typically 20–100 gallons depending on rig size and class).
- Gray water: Wastewater from your sinks and shower. Stored in the gray water tank (typically 30–60 gallons). State disposal rules vary significantly — see below.
- Black water: Toilet waste only. Stored in the black water tank (typically 15–40 gallons). The one that generates the most anxiety in first-timer threads — and that experienced RVers almost universally describe as far less intimidating after the first couple of dumps.
Fresh Water: City Connection vs. Onboard Tank
City water connection: At a campsite with water hookup, a hose runs from the site's spigot to the city water inlet on the RV. Water flows directly through the plumbing without filling the onboard tank. RVers who camp this way consistently recommend using a dedicated drinking-water-safe hose — Camco's TastePURE line is one of the most frequently cited on owner forums — rather than a standard garden hose, which can leach chemicals over time.
A water pressure regulator between the spigot and the RV inlet is strongly recommended by the community. Adjustable regulators from Valterra and Camco are among the most reviewed options, and both protect against high-pressure municipal supplies. Owners on RV forums note that very inexpensive fixed-flow regulators can restrict water pressure noticeably, which matters more on longer stays where shower flow becomes a daily consideration.
Fresh water tank: Fill the onboard tank before leaving home or at a campground water fill station, then use the rig's built-in electric water pump to pressurize the system for normal faucet and shower use. The pump cycling on and off when water runs is normal — it's one of the sounds new owners most frequently ask about in first-trip threads.
Gray Water: Tanks, Timing, and Disposal Rules That Vary by State
Gray water accumulates from sink and shower use. At a campsite with sewer hookup, most RVers connect the drain hose and crack the gray valve open — a common practice documented across campground forums. Some owners prefer to keep it closed and dump periodically, which pushes a burst of liquid through the hose on release and reduces odor buildup at the connection point.
When dry camping without hookups, gray water builds up in the tank. Owner reports on boondocking threads vary widely by usage habits, but many full-timers describe getting two to four days from a gray tank — with conservative dish-washing routines and shorter showers extending that range noticeably. Tank size, number of occupants, and shower frequency all affect capacity in ways that make any single figure approximate.
Gray water disposal regulations are not uniform — and this is one of the most consistently misunderstood areas for new RVers. In many western states, including Arizona and New Mexico, formalized gray water reuse codes permit surface disposal under specific conditions: required setbacks from water sources, soil infiltration requirements, and restrictions on plant contact apply.
California prohibits most surface gray water disposal outside of permitted residential systems. In the majority of eastern states, gray water must be disposed of at a proper dump station or sewer connection — treating it like dishwater that can be poured on the ground is illegal in those jurisdictions. RV owners planning extended dry camping should check their destination state's environmental or health department regulations before assuming any surface disposal is permitted. State parks often post specific rules at the entrance station.
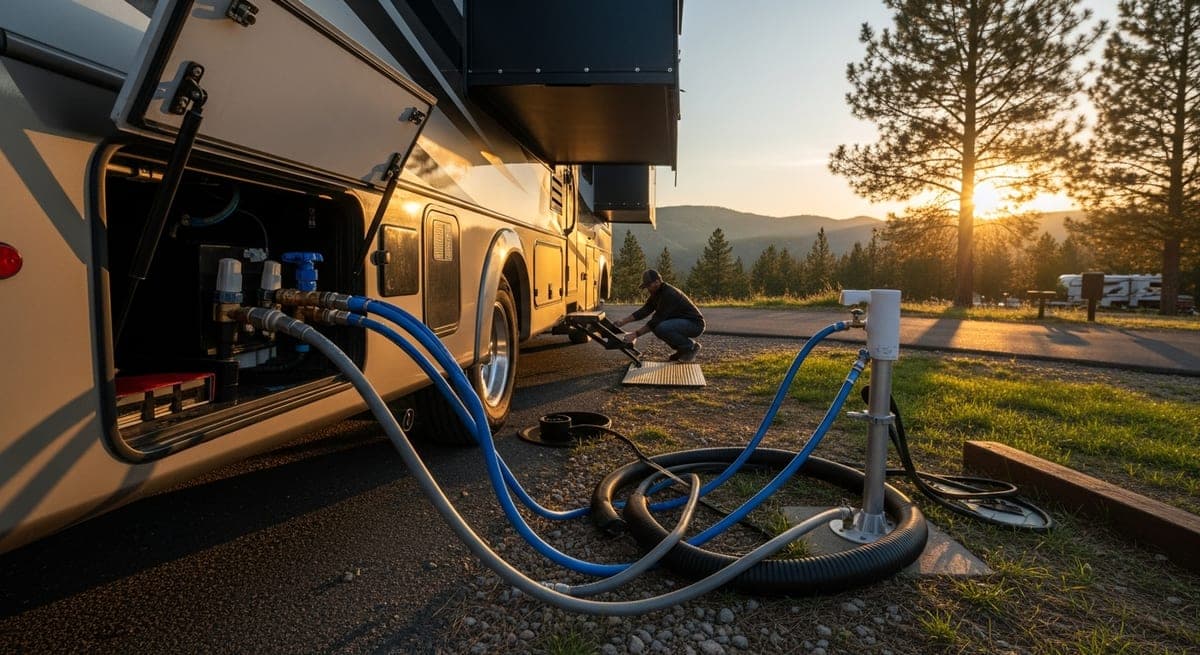
Black Water: The Dump Sequence Veteran RVers Have Settled On
The black water tank holds toilet waste and empties at dump stations — available at most campgrounds, many RV parks, and a number of highway rest stops. Sanidumps.com and Campendium's dump station listings are the most frequently recommended community resources for locating stations on the road.
Most experienced RVers follow a consistent two-valve sequence that has become the community standard — and the reasoning behind the order matters:
- Connect the sewer hose between the RV's dump outlet and the station inlet. Rhino Flex and Camco's Rhinoflex are among the most recommended hose options on owner forums. Gloves are standard practice.
- Open the black valve first. The community consensus is to let it drain fully before touching anything else.
- Close the black valve, then open the gray valve — gray water flushes the hose clean, which is exactly why experienced RVers sequence it this way rather than the other direction.
- Close the gray valve, cap the outlet, and disconnect and rinse the hose. Most dump stations provide a rinse hose at the station.
Community consensus on black tank maintenance:
- RV owners across multiple forums recommend adding a few inches of water to the black tank before first use on any trip, and flushing additional water after each toilet use to prevent solids from drying out before the next dump.
- RV-specific toilet paper — labeled "RV safe" or "septic safe" — is strongly recommended across the community. Owner-reported clogs from standard household tissue are a recurring topic, particularly in smaller tanks where the geometry makes clearing obstructions harder.
- Black tank treatment products help control odor and accelerate waste breakdown between dumps. Unique Camping + Marine's Digest-It and Happy Camper are among the most consistently well-reviewed by full-timers in long-term use threads.
- Leaving the black tank valve open while connected to sewer is a beginner mistake that experienced RVers flag more than almost any other: without liquid, solid waste accumulates into what the community calls the "pyramid of doom" — a dried mass that's difficult to clear. Owner accounts of this problem are common enough that it's a standard warning in every first-timer guide on the major forums. The black valve opens only to dump, then closes.
Winterizing the Water System Before Freezing Temperatures Arrive
Winterization protects the water system before temperatures drop below freezing. Water expanding as it freezes can crack pipes, fittings, and the water pump — a repair that owner reports consistently describe as one of the more expensive and avoidable first-season mistakes, particularly on rigs stored in northern climates without a heated garage.
The two standard approaches documented across the community are blowing out the lines with compressed air or flushing the system with RV-safe antifreeze (pink propylene glycol, non-toxic and widely available at RV supply stores). RV-safe and automotive antifreeze are not interchangeable. Most RV dealers and service centers offer professional winterization; pricing varies considerably by region, rig size, and how many drain points the plumbing has — calling a local shop for a current quote is more accurate than any published range.
Related: First RV trip checklist · Full hookup vs. boondocking · RV dump station guide
Ready to Plan Your Trip?
Put this knowledge to work. Let our AI build a personalized RV itinerary for your next adventure — or browse community trips for inspiration.