Why Roof Maintenance Is Non-Negotiable
A hairline crack in lap sealant — barely the width of a credit card edge — can let water wick into your roof decking, structural framing, and wall panels through an entire camping season. By the time you spot interior staining, the structural damage can already run into the thousands. You won't see it coming from inside.
Prevention is genuinely cheap by comparison. A tube of lap sealant typically costs around $8–$12 at most RV supply stores. A thorough roof inspection takes 20 minutes. Do both at the right times each year and you're ahead of the most expensive repair category in RV ownership.
When to Inspect (Timing Matters More Than Frequency)
Twice a year is the baseline — but timing those inspections strategically is what actually catches problems before they compound. Schedule your spring inspection in April or May, after freeze-thaw cycles have done their worst. Expanding ice is one of the most common causes of lap sealant separation, and you want to find those gaps before summer heat causes the edges to curl and harden. Your fall inspection belongs in September or early October, before temperatures drop below 50°F — most lap sealants won't bond properly in cold conditions, so if you find damage then, you need to address it while it's still warm enough to cure.
Outside those windows, also inspect after any hail event, after driving under low-hanging branches, and any time you come out of storage if someone else had access to the rig.
EPDM Rubber Roofs (Most Common)
Many RVs manufactured in the last couple of decades use EPDM (ethylene propylene diene monomer) rubber roofing — a single-ply membrane that holds up well when properly maintained. Common brands include Dicor and Heng's.
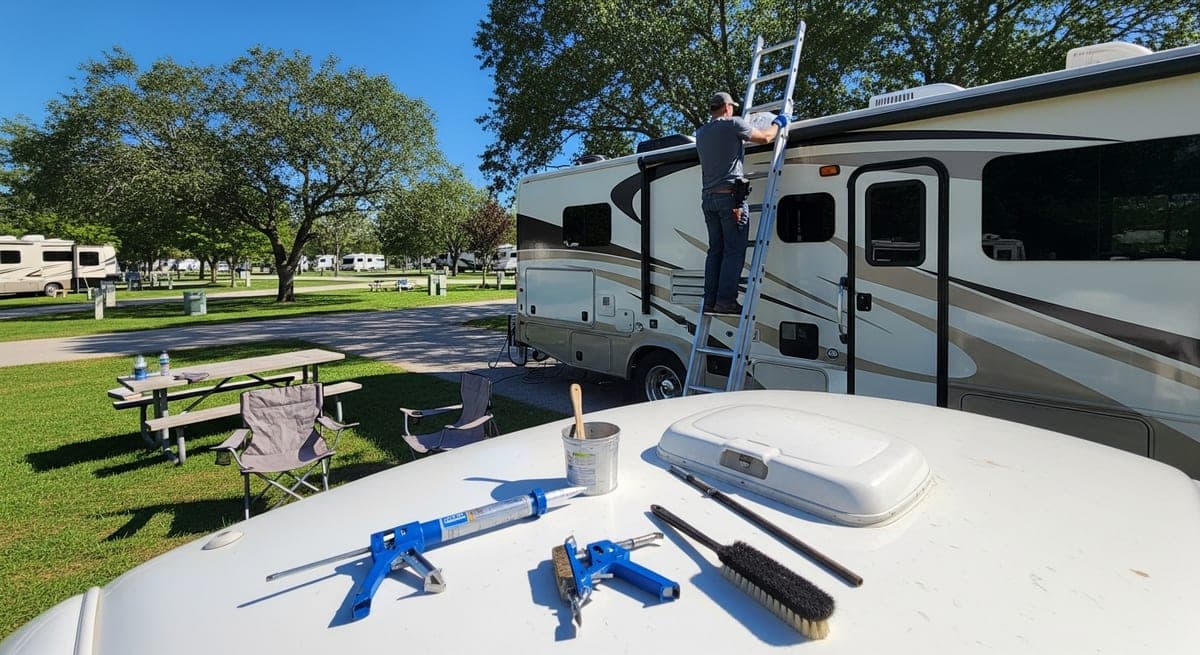
Inspection checklist for EPDM roofs:
- Walk the entire surface looking for tears, punctures, or bubbles — lifted areas where the membrane has separated from the substrate below
- Press firmly in multiple spots; soft areas suggest moisture has penetrated and the underlying wood is compromised
- Check all seams, especially where the roof membrane laps over the edge — these are the highest-risk zones
- Inspect lap sealant around every roof penetration: vents, A/C unit, antennas, skylights, roof-mount brackets
- Healthy sealant is smooth, continuous, and pliable when pressed. Failed sealant is cracked, pulling away, missing sections, or has gone brittle
Lap sealant application: Use self-leveling lap sealant (Dicor 501LSW for horizontal surfaces, 505LSS for vertical) wherever old material has cracked or is pulling away. Clean the area with isopropyl alcohol, dry thoroughly, and apply a bead that overlaps the old sealant by at least an inch. The self-leveling formula flows into gaps without tooling. Reapply wherever degradation appears at each seasonal inspection.
Cleaning EPDM: Use EPDM-specific cleaner (Dicor RPCL-1 or Camco rubber roof cleaner) or diluted dish soap. Petroleum-based products, oil, and harsh solvents break down rubber membrane chemistry — avoid them entirely. Black streaks are usually mold or algae; clean seasonally before they get ahead of you.
TPO and Fiberglass Roofs
TPO (thermoplastic polyolefin): Found on many higher-end rigs. More durable and heat-reflective than EPDM. Seams are heat-welded rather than glued, making them more resistant to separation. Inspect seams for any lifting or gaps; use TPO-compatible sealant — EPDM products are chemically incompatible, so don't mix them. Clean with mild soap and water.
Fiberglass (FRP): Common on many high-end fifth wheels and Class C motorhomes. More rigid than rubber membranes and generally lower-maintenance. Inspect for cracks, especially around penetrations, and touch up exposed areas with fiberglass gelcoat. As with any roof type, keeping lap sealant intact around penetrations is the primary job.
What Not to Do (Mistakes That Make Things Worse)
Knowing what to avoid is just as valuable as any checklist:
- Don't use standard silicone caulk. It doesn't bond well to rubber roofs, won't flex with temperature swings, and will fail faster than it took you to apply it. Use RV-specific lap sealant only.
- Don't apply sealant over wet or dirty surfaces. Any moisture or debris trapped underneath will cause it to peel within weeks. The isopropyl alcohol prep step isn't optional.
- Don't use petroleum-based cleaners on EPDM. Armor All, WD-40, anything oil-based — these accelerate rubber breakdown. Read your roof manufacturer's spec before grabbing a product off the shelf.
- Don't layer new sealant over failing old sealant. You're just encapsulating the problem. Scrape off the damaged section, clean to bare surface, then apply fresh material.
- Don't assume a clean interior means a healthy roof. Water can travel horizontally through wall framing for several feet before showing up as a ceiling stain. Inspect the roof directly — don't rely on watching for interior symptoms.
One Underrated Inspection Step
Before trusting any exterior inspection, check inside every cabinet and storage bay along the roofline. Run your hand along the top of the interior wall surfaces — soft, spongy, or discolored wood means water has been traveling down from above, even if the roof looks intact from outside.
If a previous owner applied extra sealant in a specific area — especially if it's thicker, a different color, or less weathered than the surrounding material — treat that as a direct flag for a known past leak at that spot. It almost always is.
Annual Roof Maintenance at a Glance
- Spring (April–May): Full inspection after freeze season. Replace any cracked or separated sealant. Clean the entire surface.
- Fall (September–October): Pre-storage inspection while temps are still warm enough for sealant to cure properly. Address any issues before winterizing.
- After major events: Inspect after hail, storms, or low-branch contact before your next trip — don't wait for the next scheduled window.
Related: RV maintenance checklist · Used RV buying guide · RV winterization guide
Ready to Plan Your Trip?
Put this knowledge to work. Let our AI build a personalized RV itinerary for your next adventure — or browse community trips for inspiration.