This article contains affiliate links. If you make a purchase through these links, we may earn a small commission at no extra cost to you. Learn more.
The Water Problem Nobody Talks About at the Hookup
Three seasons ago, I pulled into a campground outside Moab, Utah, and hooked up without thinking twice. By the end of the trip, our shower head was half-clogged and the faucet aerators looked like they'd been dipped in concrete. Southwestern desert water is hard — calcium and magnesium levels that would make your home plumber wince — and I'd been running it straight through our rig for 72 hours. That lesson cost me an afternoon with a wrench and a fresh set of aerators.
Water quality at campgrounds isn't random. It's regional. Once you understand the patterns, you can filter smarter instead of just filtering more.
Know Your Region Before You Filter
Municipal hookups at state park campgrounds in the Pacific Northwest — Deception Pass in Washington, Champoeg in Oregon — tend to run clean, soft water that barely needs filtering beyond taste. Contrast that with campgrounds drawing from wells across the Colorado Plateau: Canyonlands, Capitol Reef, and the private parks outside Page, Arizona, where hardness readings regularly hit 300+ mg/L. Florida campgrounds near the Gulf Coast often hit you with a sulfur smell before you even reach the faucet — hydrogen sulfide from limestone aquifers, and a standard carbon filter does surprisingly little for it.
In the Midwest, older municipal systems in smaller towns can run high in chloramines instead of just chlorine. Standard carbon filters handle them less effectively. If you camp a lot in one region, it's worth looking up your campground's water district annual report — most are public record and free to search.
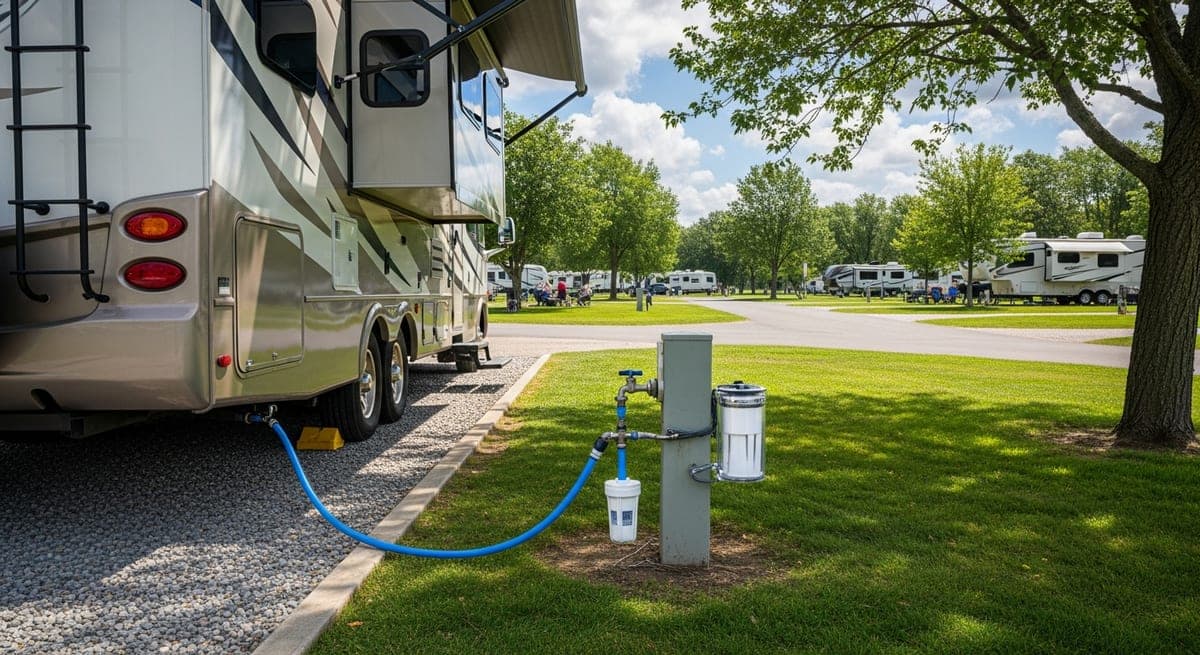
The Basic Setup: Inline Filter at the Hose Bib
The simplest starting point is a single-stage inline filter between the campground water pedestal and your city water inlet. The Camco TastePURE is the one you'll see at every Camping World and Amazon listing — widely available, easy to find, and it handles sediment, chlorine taste and odor well. Pricing has moved over the past few years, so check current retail before budgeting; it's generally an inexpensive seasonal investment.
Replace it seasonally regardless of gallons used — Camco's own packaging recommends this. Spent carbon filters can concentrate contaminants rather than remove them, so don't stretch it hoping to squeeze another season out of a $20 filter.
What it won't do: A basic carbon block filter doesn't touch bacteria, viruses, heavy metals, or nitrates. It improves taste and protects your plumbing — it's not a full treatment system. Don't rely on it as your only defense if you're pulling from an unverified well or a sketchy rural source.
Two-Stage Filtration: Worth It If You Camp Rural
Add a sediment pre-filter before the carbon stage and you've got a setup that handles most of what campground water throws at you:
- Stage 1 — 5-micron sediment filter: Captures rust, sand, and particulates that would burn through the carbon filter prematurely
- Stage 2 — Activated carbon block: Handles chlorine, chloramines (to a degree), taste, odor, and some volatile organics
Full two-stage setups typically run $60–$120 depending on brand and housing quality. If you spend time at rural locations with older infrastructure — campgrounds in Appalachia, the rural South, or small mountain towns with aging distribution systems — the sediment pre-filter pays for itself quickly by extending the life of the carbon stage.
Fresh Tank Sanitation: Do This Every Spring
Water that sits in your fresh tank for weeks grows biofilm. Not dramatic, but real — a thin bacterial layer coating tank walls and hose lines. The fix is worth doing every spring startup and after any stretch longer than 30 days without use.
Most RV manufacturers recommend a diluted bleach flush. Your owner's manual will have the exact ratio for your tank size — a commonly cited starting point is roughly 1/4 cup of unscented household bleach per 15 gallons of tank capacity, but check your manual before mixing, since tank materials and water heater types vary. The general process:
- Add the diluted bleach solution to your fresh tank
- Run water from every faucet until you smell bleach at each outlet
- Let it sit for several hours (your manual may specify a window)
- Drain completely and flush with multiple tanks of fresh water until the bleach smell is fully gone
When in doubt, call your RV manufacturer's support line. Forum advice on bleach ratios varies wildly and some of it is wrong enough to damage rubber seals or tank liners.
Drinking Water on the Road
For drinking and cooking specifically, a countertop pitcher filter works well as a second line of defense — no installation, easy to carry, and it handles taste issues that slip past the inline stage. The ZeroWater pitcher removes a broader range of dissolved solids than standard Brita carbon, which matters in high-TDS regions like the desert Southwest where the inline filter alone leaves water tasting flat and mineral-heavy.
When boondocking in areas with genuinely uncertain water — dispersed BLM camping in Nevada or remote spots in Wyoming — some RVers step up to a gravity filter like a Berkey or Sawyer Squeeze for drinking water. These handle biological contaminants that inline filters don't. They're overkill for developed campgrounds, but worth having if you regularly camp off-grid far from any tested municipal source.
Related: Water conservation boondocking · RV winterization guide · RV maintenance checklist
Ready to Plan Your Trip?
Put this knowledge to work. Let our AI build a personalized RV itinerary for your next adventure — or browse community trips for inspiration.